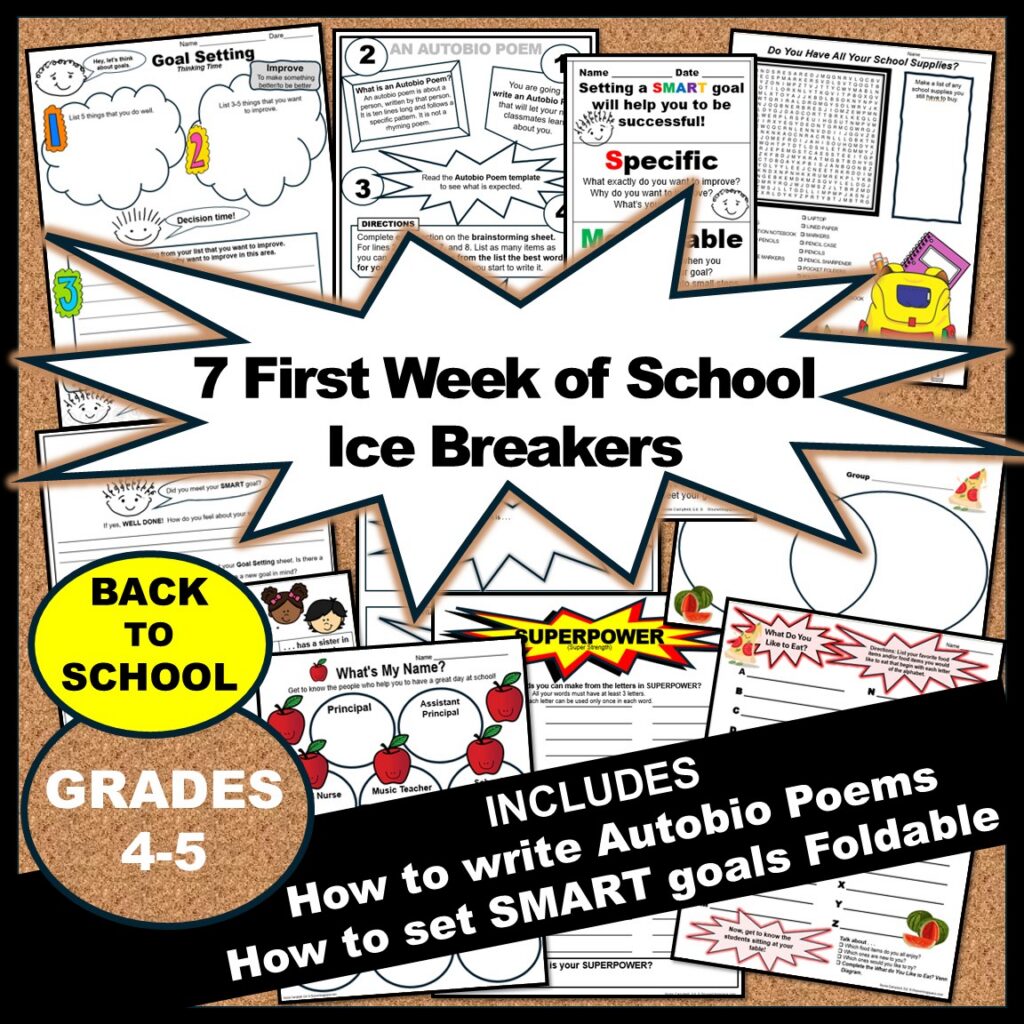
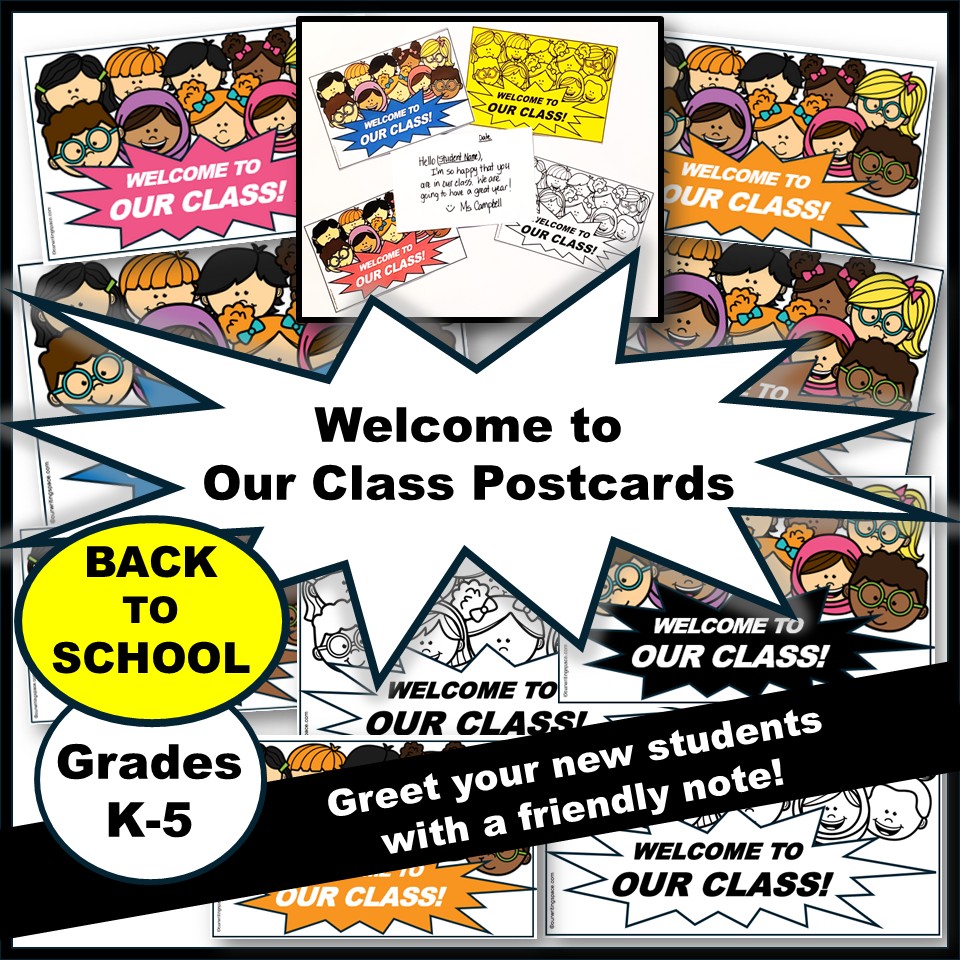
Yes, Teachers Pay Teachers (TPT) is having a BONUSSALEAugust25 – August 26, 2026. If you missed the recent sale, here is another opportunity to purchase classroom essentials, lesson plans, and activities to start the school year. Check out my store, Our Writing Space https://www.teacherspayteachers.com/store/our-writing-space to find some goodies for students in grades 3-5! Also, have a good look around at other TPT sellers’ stores. There is a lot to see!
The first few weeks of school are filled with teaching students classroom routines and procedures, and many other things depending on your school and school system. While getting these things established, I would squeeze in this activity as it is easy and can serve three purposes:
1. Students will experience a sense of success by doing a very non-threatening activity at the beginning of the school year.
2. It will help students to understand the level of neatness that is expected in future projects that require cutting and gluing down different materials.
3. Each student will have a Geometric Artwork on display in the classroom.
THE ACTIVITY
Who is this activity for? Students in grades 3-5
Objectives:Students will practice and improve their cutting and gluing skills. Students will understand the level of neatness that is expected in future projects that require cutting and gluing down different materials.
Step 1
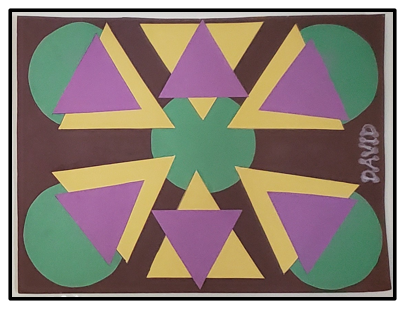
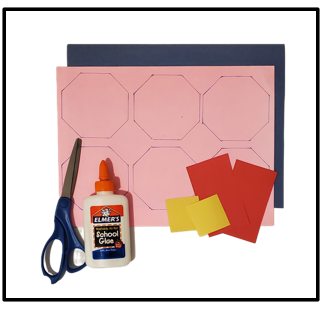
Students will choose four colored construction papers (9”x12”) and three geometric shapes (2 large, 1 small). These shapes are usually found in math manipulative kits. Students will accurately draw around all their chosen shapes. One geometric shape per sheet.
Step 2
Once they have drawn their shapes, students will cut them out. Now some students may need a demonstration on how to cut on the straight lines. This does not sound very difficult but for some students it is. They are in such a hurry to get the job done that they are not careful with their cutting. Also, they may need to be reminded how to use a pair of scissors and how to cut on the lines of a shape. Once that has been reviewed students can cut out all their shapes.
Step 3
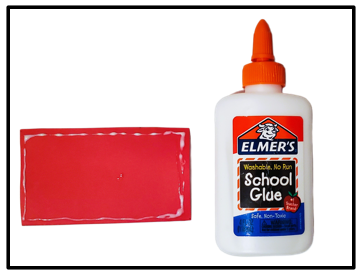
Next, have a discussion around how to glue down all the edges of a shape, especially if using liquid glue. For example, use a thin line or a dot, dot all around the edge of the shape. Often students want to just dab a little glue in the middle of the shape and leave it at that. Of course, this means that edges are left raised, making the work look untidy. As the students will have quite a few shapes to glue down, they will have repeated practice of this skill. This same strategy can also be applied when using a glue stick.
Step 4
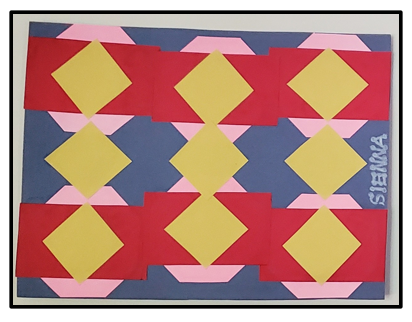
Finally, once students have cut out their shapes. They will arrange them into a design and glue their shapes onto their background color.
Once all artwork has been completed, students can be congratulated on the neatness of their work. The artwork can be put on display around the classroom.
I have found that students not only enjoy this activity but also like to see their work on display!
Happy Teaching!
P.S. I have created a Geometric Artwork Resource that can be found in my TPT store. It provides templates for geometric shapes, visuals as guides, and the specific steps to complete the activity.
Teachers Pay Teachers (TPT) will be having a Back-to-School sale August 4, 2026 – August 5, 2026.
This is a great time to purchase new Back-to-School resources and additional resources that can be added to your teaching toolkit in preparation for the coming teaching months.
Do you ever feel like there is not enough time to teach writing during a busy school day? I know that feeling! In this blog post, I want to share with you one way I squeeze in a little writing time.
My students build their writing muscles by using the strategy of writing for 10 uninterrupted minutes. This is known as our Drop Everything and Write! for 10 uninterrupted minutes sessions. This strategy can be used when there is not enough time to start a new lesson, but you want your students to be engaged in a meaningful activity. Plus, no special or extra preparation is needed.
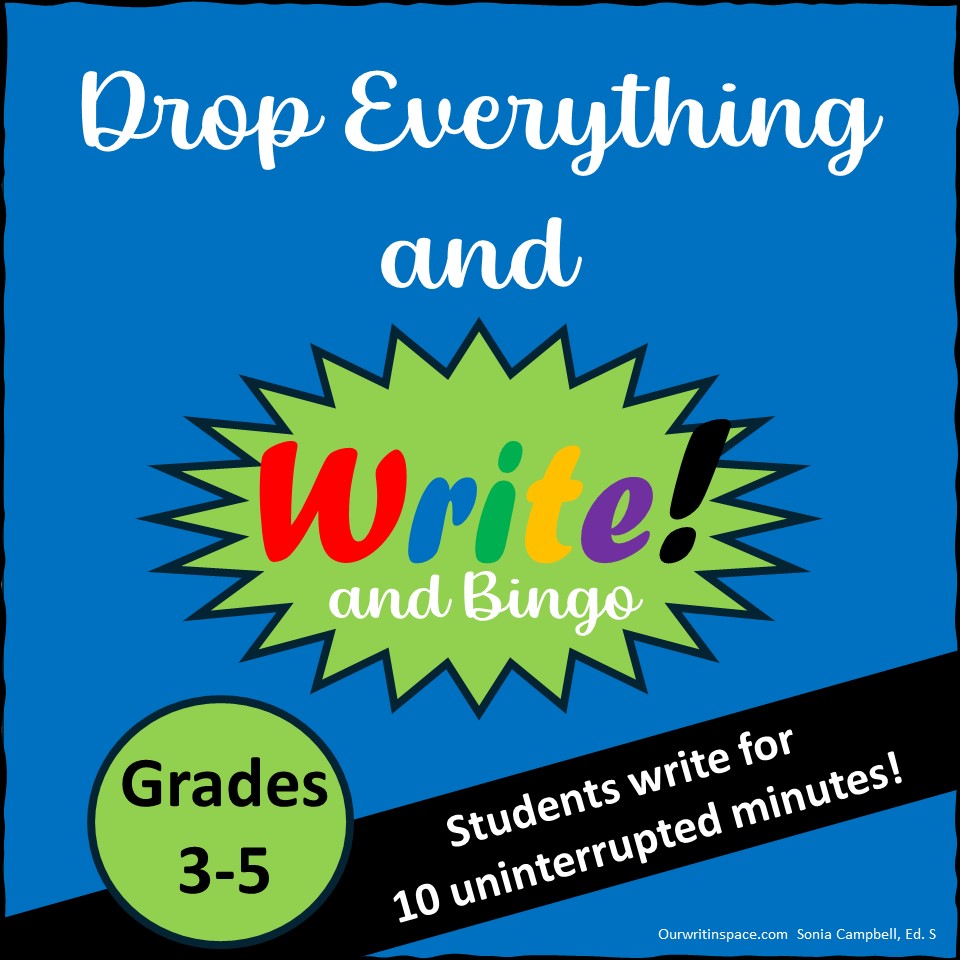
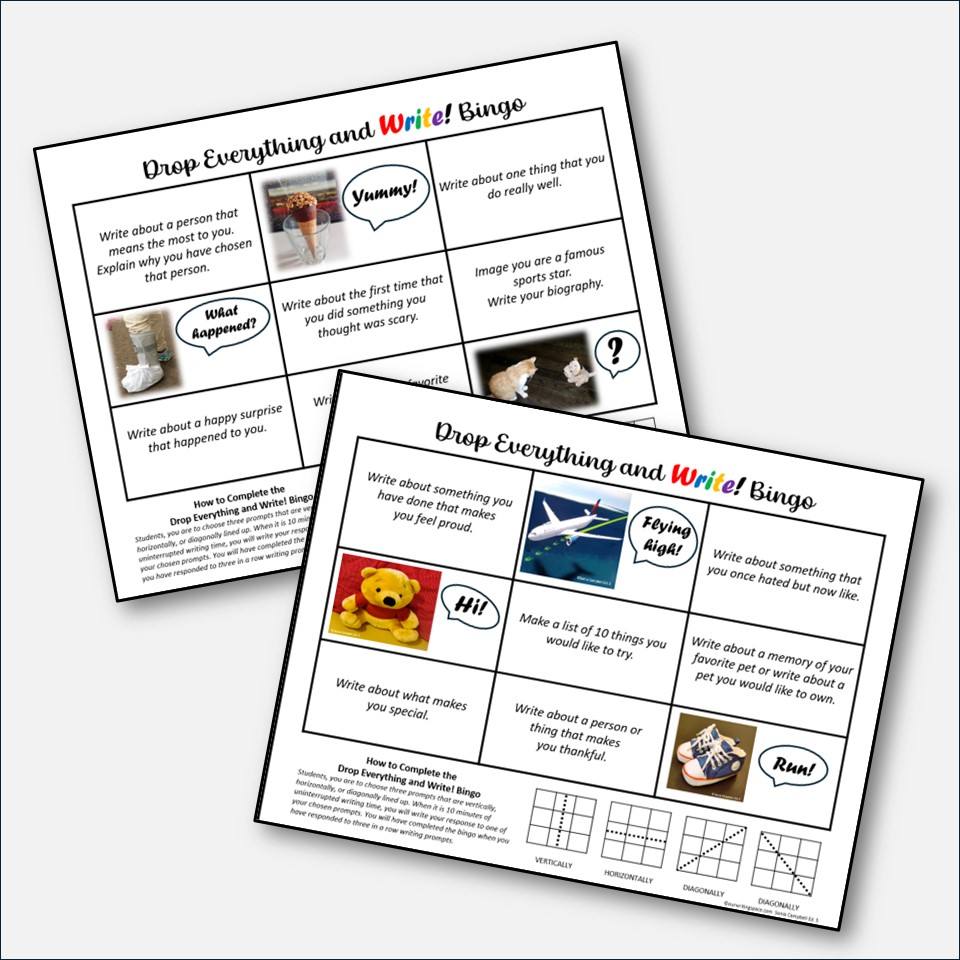
I have created a Drop Everything and Write and Bingo resource that can be used to support you as you implement this strategy in your classroom. It is in available in my Teachers Pay Teachers store. www.teacherspayteachers.com/Store/Our-Writing-Space
The Strategy
Drop Everything and Write! for 10 uninterrupted minutes. A timer is set for 10 minutes. During this time, students and teacher write for the entire time. No one is allowed to talk or do something else. Everyone is engaged in writing! The power of this strategy is that everyone is actively engaged in writing at the same time, for a short time, and it is a daily habit.
Two Writing Bingos
Included in the resource are two Drop Everything and Write! Bingos that can be used to get students’ writing juices flowing and help to warm-up their writing muscles. There are different writing prompts to help them get started with their writing but eventually they will move into writing self-selected topics.
Benefits of This Strategy
Students are writing for a short amount of time.
It is a non-threatening writing activity that can help to
overcome (for some students) the dread of writing.
It helps students to build writing muscles.
It helps to build writing confidence.
Next Steps
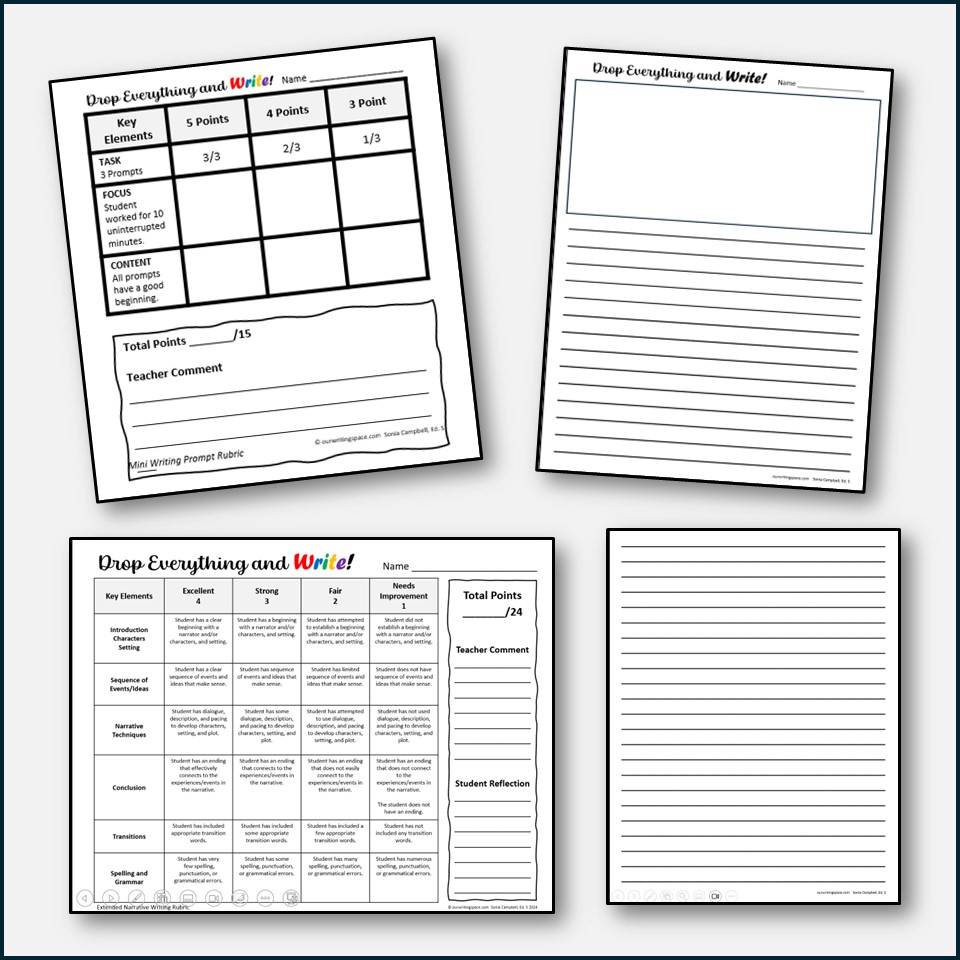
After students have completed one of the writing bingos, it can be graded using a mini writing promptsrubric. Students will not have done any in depth writing, but hopefully, have been inspired to keep writing. The rubric can indicate to the students that they are on the right track with their writing ideas. By using the rubric, you will be able to monitor how much students are participating when they Drop Everything and Write! for 10 uninterrupted minutes.
The brief writing done in the 10 minutes can lead into the main writing session. Students can take one of the ideas they started in Drop Everything and Write! and develop it in the writing workshop time, during center activities, or during independent writing time. This extended writing can be taken through the writing process by the students. The finished writing can be graded using an extended narrative writing rubric.
What Will You Find In This Resource?
2 Writing Bingos
2 Book Covers (color/black and white)
5 Drop Everything and Write! Mini Posters (Color/ Black and White)
9 Writing Pages
1 Mini Writing Rubric
1 Extended Narrative Writing Rubric
Detailed Teacher Instructions
For more information about how I encourage my student to write for ten uninterrupted minutes, please read the blog post, Building Elementary Writing Muscles.
Three books that I have enjoyed reading are Pies from Nowhere: How Georgia Gilmore Sustained the Montgomery Bus Boycott by Dee Romito, Let the Children March by Monica Clark-Robinson, and The Oldest Student: How Mary Walker Learned to Read by Rita Lorraine Hubbard. These stories bring out the strength, determination, and perseverance of different individuals and groups.
If you are interested in learning more about the individuals in the stories, I have included links to the books being read online and videos.
I hope your students enjoy learning about Georgia Gilmore, the Birmingham Children, and Mary Walker!
Pies From Nowhere: How Georgia Gilmore Sustained the Montgomery Bus Boycott
This is an interesting story as we learn about an individual and her team who worked behind the scenes to support the Montgomery bus boycott that started in 1955. Georgia Gilmore and the Club of Nowhere cooked and baked food to raise money to support the action. She was fired from her job when they found out she was a part of the boycott. Martin Luther King, Jr. encouraged her to start her own cooking business. The business took off and many people went to her house for meals. In addition to this, her home became a meeting place for civil rights leaders. When the boycott was over, Georgia Gilmore kept on cooking as there was more work still to be done.
Let the Children March is about the Birmingham Children’s Crusade, that took place in Alabama, May 2 – 10, 1963. As Black parents were fearful of losing their jobs, their children decided to march in their place. It was a nonviolent protest that was led by Black children against segregation. The violent ways they were treated by the police was captured by news photographers and television crews. The country and the world were horrified by what they saw. Not long after this exposure, the white city officials and Black civil rights leaders reached an agreement. The actions of the children played an important role in ending legal segregation.
The Oldest Student: How Mary Walker Learned to Read by Rita Lorraine Hubbard
In 1848, Mary Walker was born into slavery. She did not learn how to read until she was 116 years old. She was certified as the nation’s oldest student and was twice named Chattanooga’s Ambassador of Goodwill. She died when she was 121 years old.
“I don’t know what to write!” is something that I have heard countless students say when they have been told that they could write on any topic of their choice. Some students would jump straight in with ideas flowing, while others sit not knowing where to start. Their uncertainty led me to think about ways students could be taught to generate their own writing ideas. Here are three strategies that I have found effective, and students have found engaging.
Strategy One
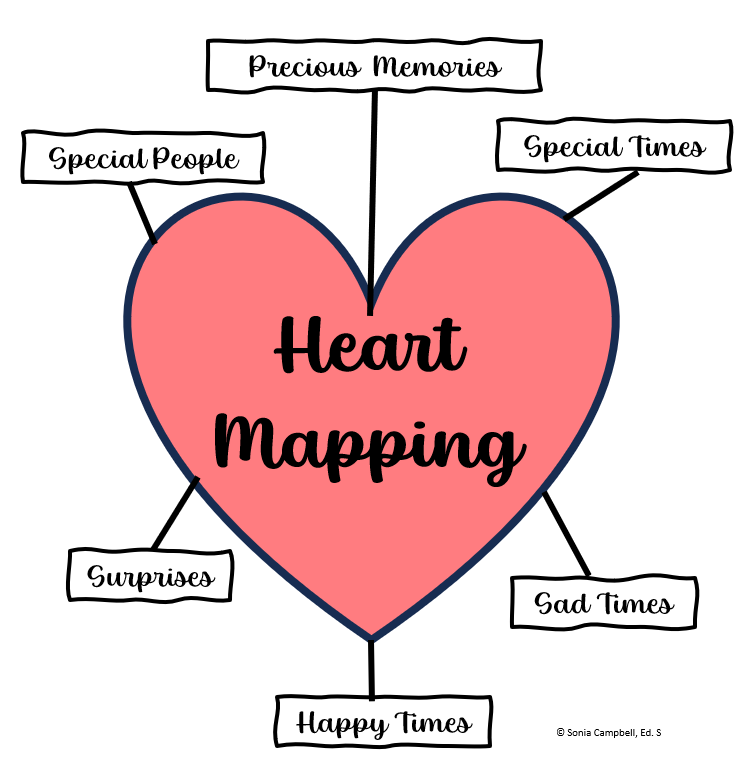
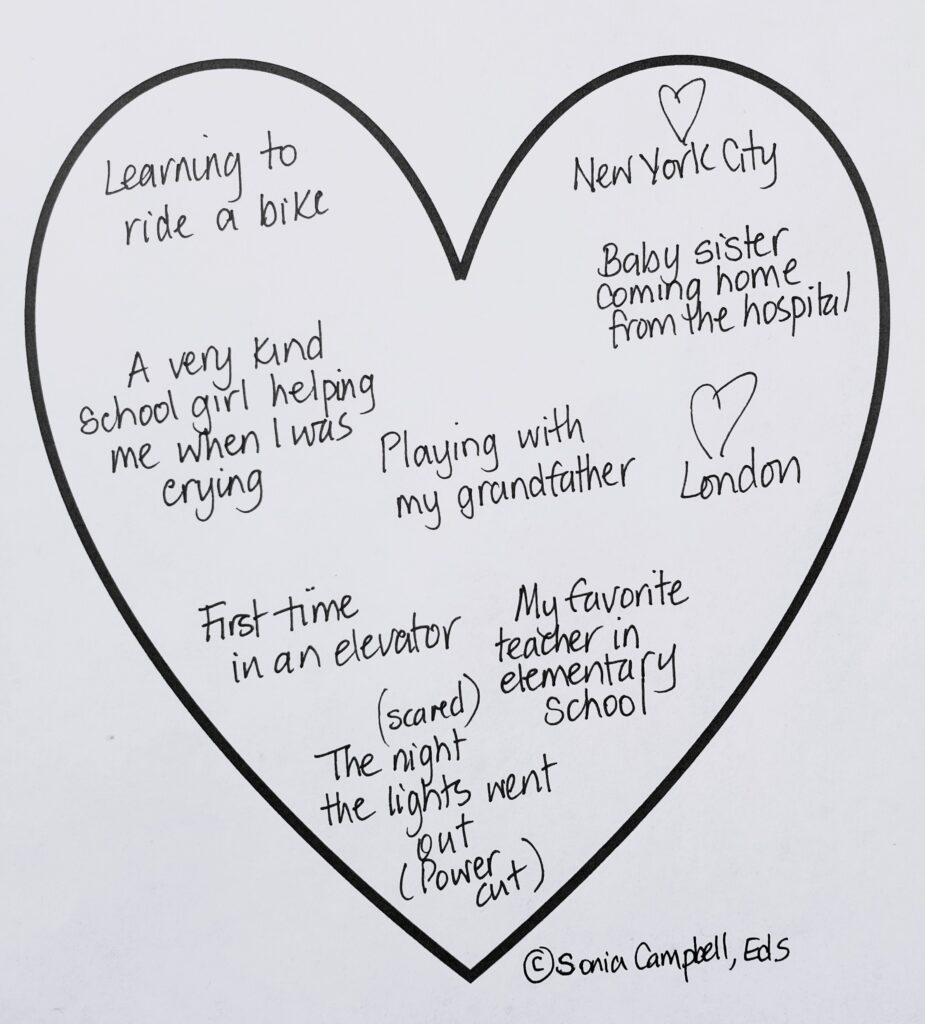
The heart mapping strategy shared by Georgia Heard in her book, Awakening the Heart: Exploring Poetry in Elementary and Middle School, is effective not just for generating ideas for poetry writing but also other types of writing.
Activity
Students draw the outline of a large heart in their notebooks, or they could be given a printed version to glue into their notebooks. In the center of the heart, students, in a few words or phrases, jot down their special memories, special people, and special events that mean the most to them.
Strategy Two
For this strategy, students create a running list of very broad writing ideas at the back of their writer’s notebooks.
Activity(Possible list ideas.)
Places they have visited.
Things they like to do.
Things they do very well.
First time they did something.
Accomplishments
Favorite foods
Favorite movies
Favorite sport stars
Favorite books
Strategy Three
This strategy is centered around visual prompts.
Activity
Students collect photos and pictures from various sources, e.g., magazines, the internet, etc. They are then glued into their writer’s notebooks. Students will collect the images that they find interesting. As they look at their images, they can create stories related to them. For example, they could imagine what happened before the picture was taken, what is happening in the picture, and what happened after the picture was taken. They can use their imagination to create characters and stories around the images.
Students now have a bank of possible writing ideas, and they have a starting point for when they are able to choose their own writing topics. They can add to the strategies throughout the school year.
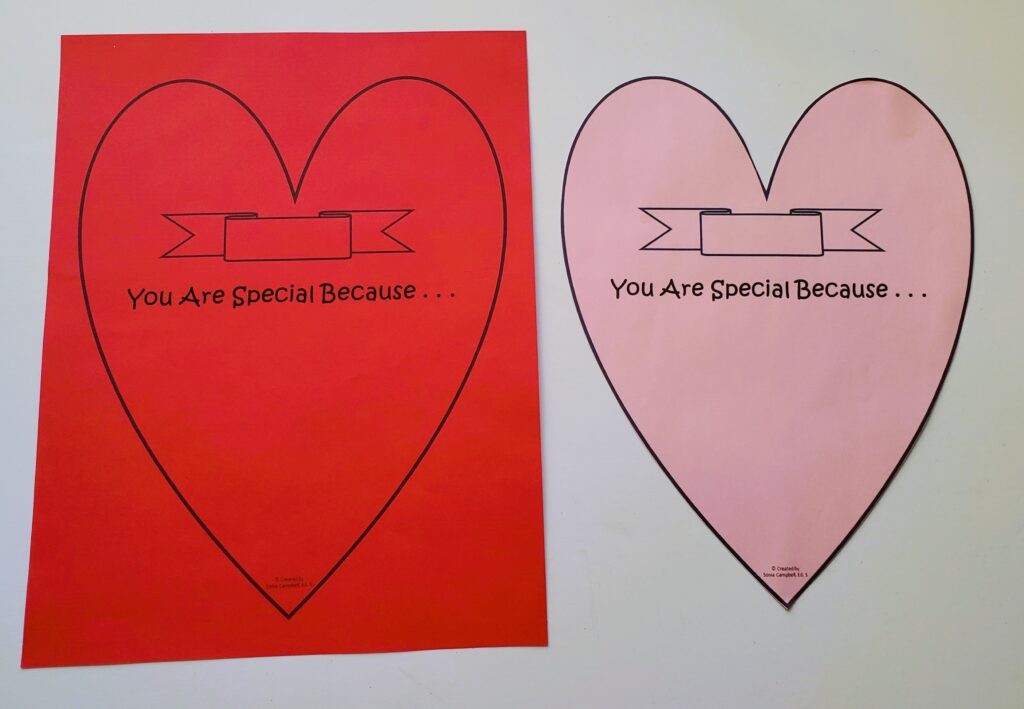
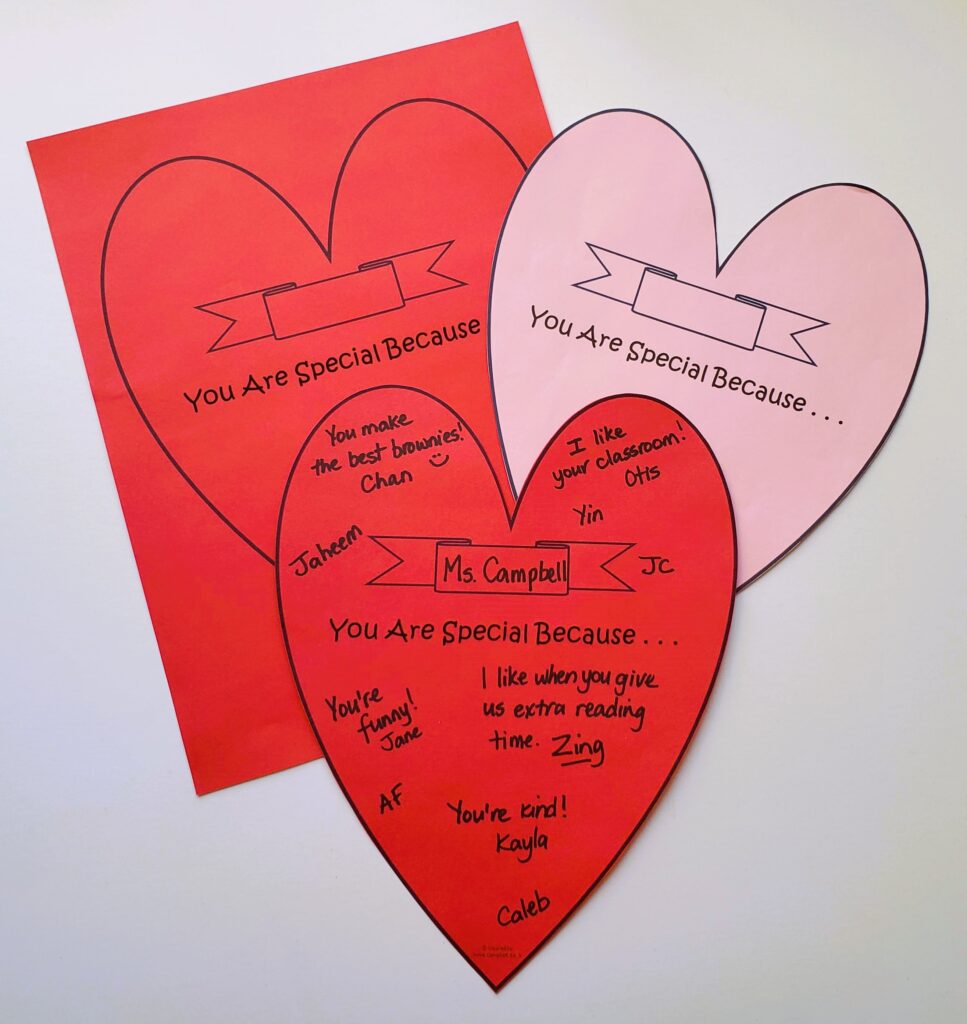
This Valentine’s Day activity is an opportunity for students to tell each other how they are special. At the end of the activity, each student will have a You Are SpecialBecause . . . heart that has been signed by their classmates with comments about what makes them special.
All students can take part in this activity. It would be nice for all students to have Valentine’s Day treats to share, but that may not be possible. The teacher could provide additional treats.
Preparation Before the Activity
You Are Special Because . . . template.
Print and cut out a class set of You Are Special Because . . . heart. (The free heart PDF is below.)
The cut-out hearts are taped on to students’ desks/tables and the teacher’s desk.
It is suggested that the teacher prepares a small treat for each student.
A Read Aloud Before the Activity
I recommend reading Somebody Loves You, Mr. Hatch by Eileen Spinelli to the class to get students thinking about how we can make each other feel special and why this is important. Here are some questions that can be shared with the students before the reading. The questions will help them focus in on the text.
1. How is Mr. Hatch at the beginning of the story?(Mr. Hatch is lonely.)
2. What happens to make him share chocolates from the heart-shaped box? (Mr. Hatch gets a heart-shaped box that has a card that says, “Somebody loves you.” He laughs, dances, and claps his hands. He is happy.)
3. How does Mr. Hatch help Mr. Smith and Mr. Todd?(Mr. Hatch watches Mr. Smith’s stand so that he can go to the doctor. Mr. Hatch looks for Mr. Todd’s little girl.)
4. What causes Mr. Hatch to go back to being alone?(Mr. Hatch finds out that the Valentine’s heart-shaped box and note was not meant for him.)
5. How does everyone react?(Everyone gathers outside Mr. Hatch’s house to show that “Everyone loves Mr. Hatch.”)
Class Discussion
How does Mr. Hatch change from the beginning to the end of the story?
In the beginning, Mr. Hatch is very lonely. When he receives a heart-shaped box with a note that says, “Somebody loves you.” He becomes friendly to everyone. When he finds out that the box was delivered to the wrong address, he goes back to being alone. However, in the end, everyone shows him that he is loved and that he is special. He embraces their love.
Next, have a specific time for students to pass out their Valentine’s Day treats.
Example of how the You Are Special Because . . . template can be filled in.
Directions to students
Students are to write a nice comment about why they think that student is special.
If a student cannot think of something to say but wants the person to know that they are thinking about them, they can just write their name or initials.
If a student cannot think of anything nice to say, they are to leave the heart blank and move on to the next heart.
Students and teacher will walk around the room signing hearts and leaving treats on desks/tables.
After the alloted time, students and teacher will sit down to enjoy their treats and read their hearts!
Hopefully, this activity will leave all students and teachers feeling very special!
Happy Valentine’s Day,
Sonia
P.S. Here is the free download for the You Are Special Because . . . template.
I have found that it is helpful to introduce the writing process to students at the start of the school year and/or before we jump into focused writing. When I do this it helps the students become familiar with the writing process vocabulary, see the big picture of how we will approach writing, and understand the writing process is a guide to help us tackle our writing.
Prewriting
Before students can begin writing they need to have something to write about. This step is intended to help them find an interesting topic through brainstorming, freewriting, generating ideas, listing ideas, talking to others, etc. Students are more likely to take ownership of their writing when they have chosen their own topics.
Drafting
Once an idea has been chosen, I suggest that the first draft be written in their writer’s notebooks. I remind my students that a writer’s notebook is a place to hold their thinking. The first draftwill not beand shouldnot be perfect. It will be a skeleton of an idea that needs to be developed. At this stage, students should aim to have a beginning, middle and end to their writing as this will make a peerconference much more productive. Once the writer has a draft it is time to get feedback from a listener/reader. This is a peer conference time. Students may meet as often as they need to, but the meetings should not take over their writing time, and the meeting must help the writer. If this is not carefully structured students will see this as a time to socialize. I suggest that they meet a maximum of ten minutes and then return to their writing spot. The teacher will also be involved in teacher/student conferences.
Revising
This is the step that students enjoy the least because it requires them going back and taking a very close look at the work they have done so far. Often young writers think that writing is done in one take and they want to jump to publishing. Before publishing, they need to ask themselves some revising questions. For example, Did I write about one idea? Do I need to move sentences/paragraphs around? Do I need to add more details? Do I need to delete parts? Does my writing make sense as a whole? If they have had peer or teacher conferences, they should have a few ideas as to how they can move forward in their writing.
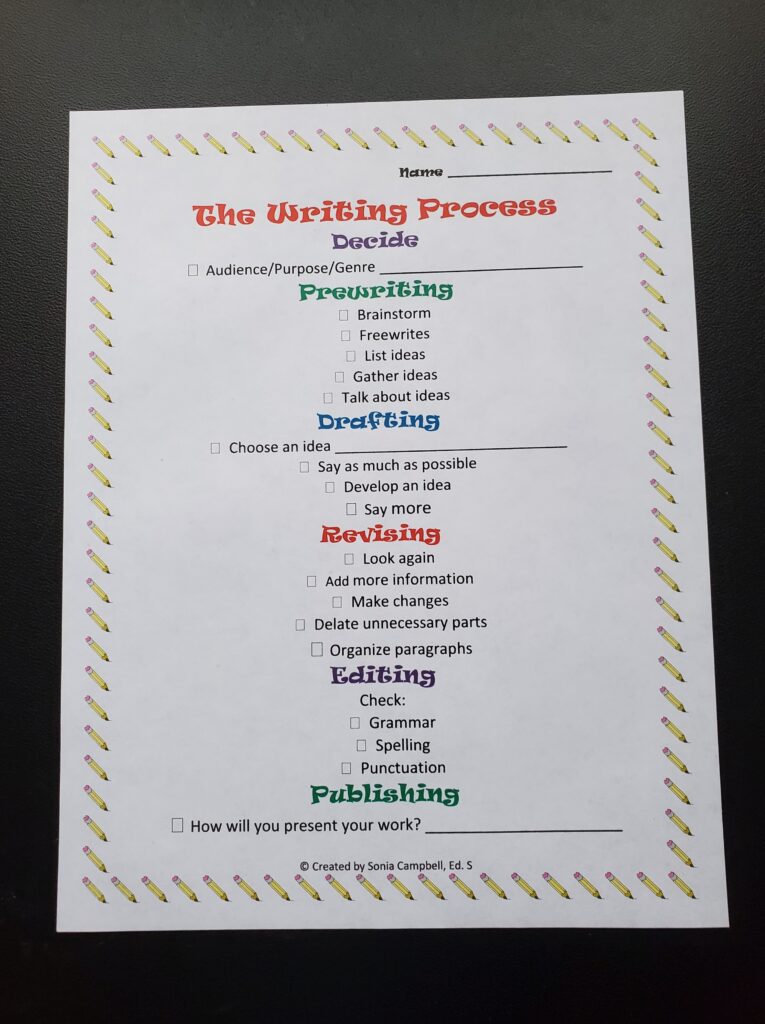
The Writing Process Checklist for Students
Editing
This is the time for students to focus on checking grammar, punctuation, and spelling. Students can work on their own or with a partner to check their work. For an effective peer conference, you need to give clear guidelines and model expectations. An editing checklist will help to guide conferences and students working independently.
Publishing
For the final step students will publish their writing in an appropriate format. The format will depend on the genre.
Finally, keep in mind that the writingprocess steps can involve revisitingsome stepsmore than once. As students work through the process, they will see that there are times when they want to revisit a step to make their writing stronger. For example, while students are editing, they might recognize that there is something that they want to go back and revise. This is a normal part of being a writer and I think it shows that the student is placing value on clearly communicating their writing idea.
Keep it going!
Once you have shared the writing process steps with the students be sure to have them on display so your students can refer to them throughout the school year.
Happy Writing!
Sonia
P.S. Below are free downloads of a mini poster of The Writing Process and a Writing Process Checklist that can be used in your classroom. Students can check off and fiil in the blanks on the checklist to help them stay focused and on target as they write.
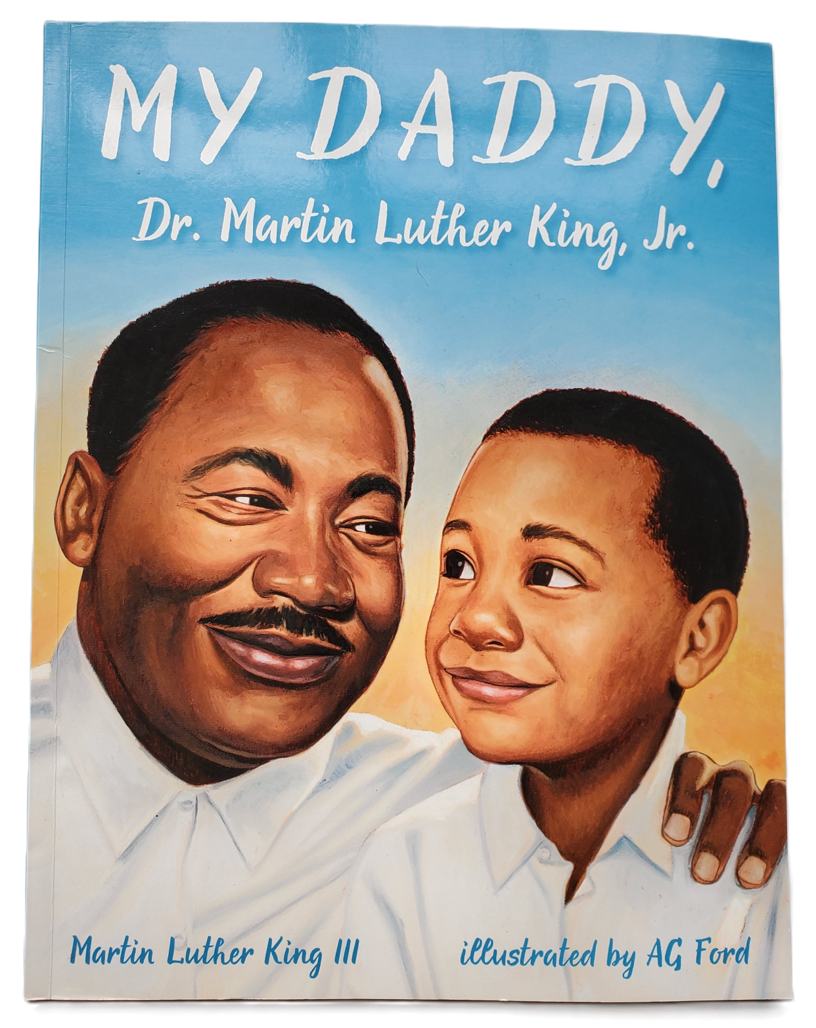
My Daddy, Dr. Martin Luther King, Jr. by Martin Luther King lll
This picture book narrative is told from the perspective of Martin Luther King, Jr.’s eldest son, Martin Luther King lll. He says, “There have been a lot of books written about my father. But not a whole lot has been written about my dad.” He reflects on the father side of his well-known father. He shares their father and son relationship, and how he felt about his father’s work. Martin Luther King, Jr. died when he was 10 years old.
I think this a great read aloud to share with students in grades 3-5 as it is an opportunity for them to learn about Martin Luther King, Jr from a child’s perspective, his son, Martin Luther King lll. Most likely, students will already have some knowledge about Martin Luther King, Jr. and the work that he did. Usually, they will have heard the information from an adult’s point of view.
Class Discussion
After reading the text, ask students to share any new information that they learned about Martin Luther King, Jr. For example, the kind of games he played with his son, he was not a tall man, and he had the boys burn the toy guns they had received as Christmas presents.
Martin Luther King lll and his sister, “complained” to their parents that they didn’t want to go to the new school.
Can you think of a time when you had to go to a new school? How did you feel? Why?
If you were Martin Luther King lll and his sister having to go to their new school, how would you feel? Why?
I prefer to have a hard copy of the book to share with my students. That way I can use post-its to pinpoint discussion points. If you are unable to get a copy here is a link https://youtu.be/msrEu5tOGMA to the book being read online.